

You’ll need to know how to crop a screenshot on a Mac if you want to take a picture of an app that is open but leave out the dock or menu bar.
There are a few methods to take a screenshot of your window, the entire screen, a specific area of the screen, or both. The screenshots you take will automatically be saved as image files on your Desktop. You can modify the location where macOS saves screenshots. The default format for the screenshot will be a PNG file, but you can modify this setting.
Read on to find out how to crop a screenshot on a Mac.
Essential Keyboard Shortcuts For Taking Mac Screenshots
You might need to learn how to take a new screenshot first before you can crop an existing one.
Using one of the many keyboard shortcuts is the fastest way to take a screenshot on a Mac out of the various methods available. Utilize the built-in screenshot cropping tool to edit screenshots as you take them if you’re using macOS Mojave or a later version.
If you’re unsure how to take screenshots, use these shortcuts:
- Take a screenshot of the whole screen: Shift + Command + 3
- Capture part of the screen: Shift + Command + 4
- Capture a window or menu: Shift + Command + 4 + Space bar
How To Crop A Screenshot On Mac?
With Grab
You can screenshot images on a Mac using Grab if you’re an average Mac user. A time-delayed screenshot can be taken on a Mac using Grab in addition to the standard Mac screenshots. If you’re using macOS Catalina, you must search for it by pressing the Command, Shift, and 5 key combinations.
- Open Grab on the Launchpad as the first step. Alternatively, you can also locate it in the Applications folder.
- Step 2: The Grab menu bar is visible on the Dock.
- Step 3: Utilize Grab to crop an image on a Mac by selecting Selection, Window, Screen, or Timed Screen.
- Step 4: To export your Mac screen capture image as a JPEG, PNG, or TIFF, select Save from the File drop-down menu.
With Keyboard Commands
Use the Mac screenshot keyboard commands to instantly capture any area of the screen on your Mac computer. The screenshot will be automatically saved to the desktop. On a Mac, you can press Control with other predetermined combinations to crop a screenshot before copying it. The screenshot thumbnails can then be edited using different photo editors.
With Built-in Screenshot Cropping Tool
The most effective way to crop a screenshot on a Mac may be to use the new, built-in tool.
A floating thumbnail will appear in the bottom-right corner of your screen in macOS immediately after you take a screenshot. It’s a small version of your screenshot, and clicking it activates the cropping tool.
The thumbnail will vanish and you won’t be able to use the tool if you don’t click on it within a short period of time. Sadly, there is no way to extend the period of time before it disappears.
- Press the Crop icon (top-right) after taking your screenshot.
- Choose the portion of your screenshot that you want to retain.
- When you’re finished, press Done.
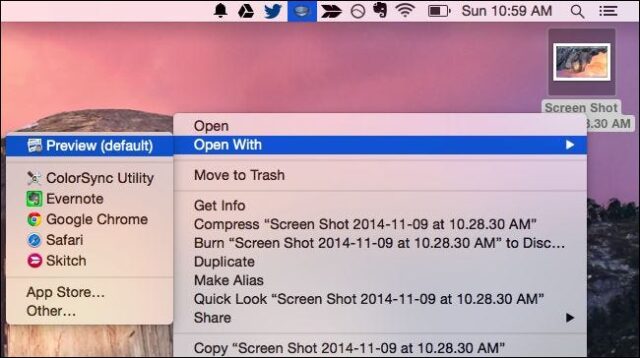
With Preview
In macOS, the Preview app automatically launches when you double-click an image. This tool allows you to quickly crop your screenshots.
- To launch the Preview app in Finder, double-click on an image.
- Select the Show Markup Toolbar icon (top-right—shaped like a pencil.)
- Use click and drag to select the area you wish to keep.
- From the menu bar, press Tools.
- From the drop-down, select Crop.
With Photos App
For managing your images on macOS, you can use the built-in Photos app. It can also be used to quickly crop screenshots on a Mac as a simple photo editing tool.
Before you do this, though, you must save your screenshot to your Mac.
- Open Photos, then press File > Import.
- Choose the image you want to edit.
- Press Import.
- Double-click the image you imported, then press Edit (top-right).
- At the top, select the Crop button.
With Third-party Tools
There are a number of third-party apps that allow you to edit images—you can check these out by clicking the Photo & Video section in the App Store.
These include favorites like Adobe Lightroom, Polarr Photo Editor, Pixelstyle Photo Image Editor, and more. Online stores sell apps that are comparable. When it comes to cropping, every third-party photo-editing tool behaves slightly differently from the one before it.
Let’s look at Polarr Photo Editor as an example to see how cropping functions. To edit screenshots using Polarr Photo Editor:
- Press File > Open.
- The image you want to edit should be chosen.
- On the left, press the crop icon.
- Decide which area you want to save.
- Press the Save Photo icon to save the image.
Crop A Screenshot On Mac Of Full Screen
- Press Shift, Command, and 3 in the first step.
- To edit the screenshot, go to Step 2 and click the thumbnail there.
- Step 3: A desktop icon will automatically appear with the Mac screenshot.
Crop A Screenshot On Mac Of Any Portion
- Press Shift, Command, and 4 in the first step.
- Set the screen capture area by dragging the crosshair in step two.
- To crop a screenshot on a Mac, proceed to step 3 and let go of the mouse or trackpad.
- The screenshot will be saved to the Mac desktop in step four.
Crop A Screenshot On Mac Of A Window Or Menu
- Step 1: Press the Space, Command, Shift, and 4 keys.
- Step 2: Pass the mouse cursor over the window or menu you wish to record.
- Step 3: On macOS Catalina, click to crop a screenshot.
- Step 4: To remove the window shadow from the screenshot, press the Option key.
- Step 5: The Mac screenshot image will quickly appear on the desktop.
Why Isn’t A Screenshot On A Mac Working?
You cannot use the built-in screenshot programs and shortcuts if you crop a screenshot on Apple TV and other connected Apple software. You cannot crop screenshots while using Chrome in Incognito mode on a Mac.