For capturing, archiving, and referencing online content, your mac’s screenshot feature is helpful. You can quickly combine these images into larger documents, study guides, appendices, and more by converting them into PDFs.
With the help of this screenshot, you can now decide whether to combine them into a single PDF document, which is possible. You will then need an application that can convert screenshots to PDFs on Mac. We’ll look at how to convert a screenshot to a PDF on a Mac in this article. Please keep reading.
How Do I Take A Screenshot On A Mac?
There are numerous keyboard shortcuts available on Macs for taking various screenshots. The Touch Bar (for MacBook Pros) also has a dedicated “Screenshot” tool for the same purpose.
Method 1: Using Keyboard Shortcuts
- Pressing Shift + Command + 3 simultaneously will take a screenshot of the entire screen.
- To capture a portion of the screen, press Shift + Command + 4 and use the crosshair tool to select the area you want to capture. To move the selected area, press the Spacebar (without raising your finger from the trackpad) and drag the selection to the preferred area.
If your MacBook has a Touch Bar, press Shift + Command + 6 to capture the Touch Bar screen.
Method 2: From The Touch Bar Control Strip
The Touch Bar on a MacBook can be used to take a screenshot of the display as well. Expand the Control Strip and tap the Screenshot icon.
- In the Captured Selected Portion section, select the area you want to capture, and select Capture on the screenshot menu.
- To capture the entire Mac display using the Touch Bar, select the Capture Entire Screen icon on the far-left, and select Capture.
- Capturing an app window is another choice. Select the Capture Selected Window icon, hover the camera icon on the app you want to screenshot, and select anywhere on the app window.
You may be interested in Screenshot On Mac Not Working: 10 Methods To Fix
How Do I Edit A Screenshot On A Mac?
Whatever approach you select, your Mac will show a thumbnail of the screenshot in the bottom-right corner of the screen.

When you tap the thumbnail, the Preview window will open, allowing you to edit the screenshot‘s size and crop, add texts and shapes, insert signatures, and share it via AirDrop, Messages, Mail, etc. Converting screenshots to different file formats is another feature of this built-in editor. You may be interested in Screenshot On Mac Not Working: 10 Methods To Fix
How To Turn A Screenshot Into A PDF On Mac?
Method 1: Convert Screenshot To PDF On Mac From Capture
Step 1: Create PDF From Capture
On opening the PDFelement software, go to the main menu and click on the “File “option. From the drop-down menu click on “New” and you will see three image options that you convert to PDF.
- From PDF File: You can upload pre-existing PDF files and combine them into a single PDF file using this option.
- PDF from Window Capture: With this feature, you can make a PDF out of any desktop window that is open.
- PDF from Selection Capture: Uses the selection tools to make a PDF from a specific area that you specify.
- Create a PDF using the information from the full screen by using the PDF from Screen Capture option.
Now, you can go for say “PDF from Screen Capture” select the captured images and upload them to the program.
Step 2: Save The Converted PDF
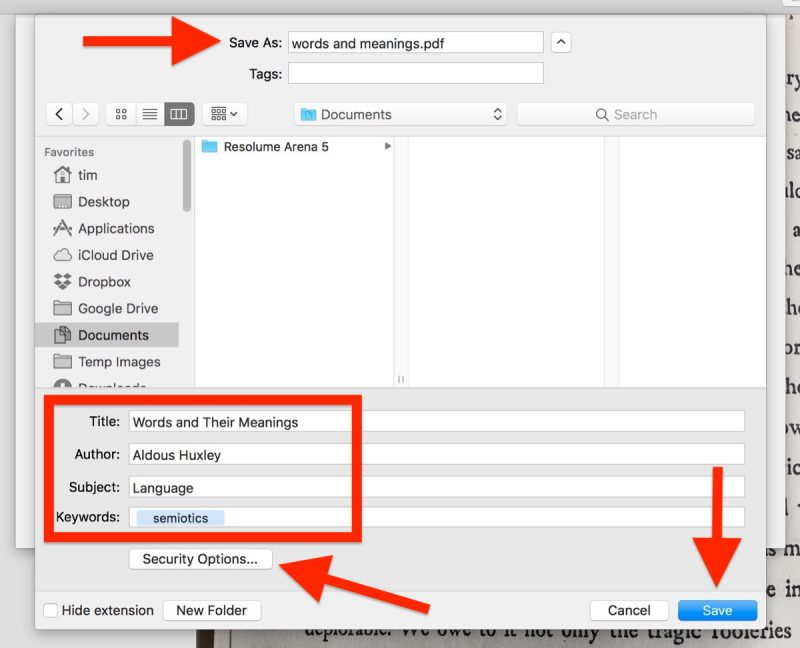
After uploading the screenshots that were taken. Before converting them to PDF format, you can choose to arrange and edit them. Now, to convert the screenshots to PDF format, head to the main menu click on “File” and select the “Save” button. You will have the option to name the converted file and choose where on your computer to save it.
Method 2: Convert Screenshot To PDF On Mac From Create PDF File
Using the Create from PDF file option on a Mac, you can also convert a screenshot to a PDF document. In other words, you want to create a readable PDF from your image, which is a PDF text form. To save the screenshot to a PDF on a Mac, you must use PDFelement.
Step 1: Create PDF From The Screenshot
On your Mac, open the PDFelement software and click on “File” on the main menu. There will be a list of choices in a drop-down menu. Click on “New” and then click on the “From PDF File” option. You can choose a PDF file with images and upload it to the program using the provided functionality.
Step 2: Save
After that, you can decide if you need to edit the text or layout of the document before converting it. If there are no changes that need to be made, then click on “File” on the main menu again and click on the “Save” option.
From there, you can give your file a suitable name and select a path folder on your Mac to save it in. Complete the action by clicking on the “Save” button.
Method 3: Convert Screenshot To PDF On Mac Through Drag And Drop
Step 1: Drag And Drop Your Screenshot Into PDFelement

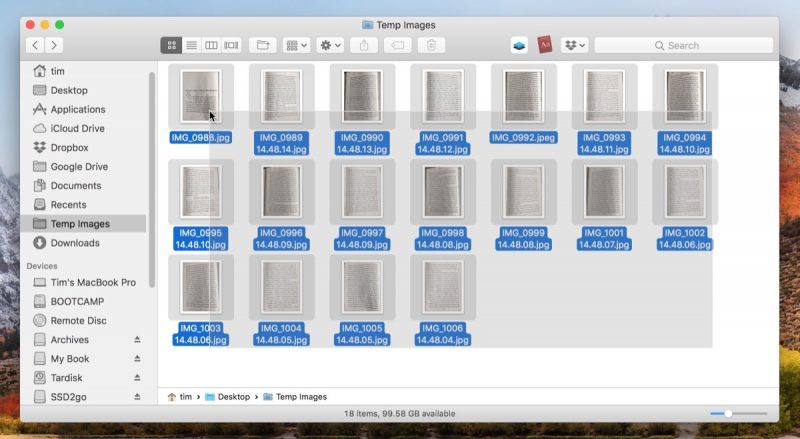
By dragging and dropping a screenshot on the home menu, you can also upload it to PDFelement. Before proceeding to the next step, you can add as many screenshots as you like.
Step 2: Perform OCR (optional)
Because the screenshots are based on images, you can choose to edit them using OCR. Once you upload the screenshot, the program can determine whether it is an editable or non-editable file. If it is not an editable file you see the “Perform OCR” option pop up at the top of the document. Click on “Perform OCR”.
Step 3: Edit The Screenshot
The screenshot will now be editable thanks to the program. You can edit or delete a text by clicking on it. Additionally, you can alter the format of the paragraphs, the font size, the font style, bold, and the italic.
Step 4. Save File
Lastly, when you are done editing, click on “File” followed by “Save”. From there, choose a path and type a file name to convert the screenshot to a PDF on a Mac.
How To Use Preview To Save Mac Screenshots In Any Format?
You can use Preview to change a specific screenshot’s format on a case-by-case basis if you don’t want to change the format for all Mac screenshots but don’t want to save any screenshots in a different format either.
If you don’t always want the screenshot in a single format, this is helpful. TIFF files are a good example; however, they are very large in size. Contrarily, PDF is challenging to insert into documents or blog posts. PNG files can be quite large, but they are sharp. Additionally, JPEG or JPG occasionally offers lower image quality and blurs text.
Therefore, if a default format doesn’t work for you, you can use these instructions to take a Mac screenshot and save it in any format you like. Here’s how.
- Open the Preview app from the Applications folder or by searching for it with Spotlight.
- From the top menu bar, click File > Take Screenshot then choose From Selection, From Window, or From Entire Screen based on your needs.
- The screenshot is opened immediately by Preview after being captured with it. Click File > Export.
- Click the Format dropdown box and choose one of the desired formats for the screenshot like HEIC, JPEG, JPEG-2000, OpenEXR, PDF, PNG, or TIFF.
- Furthermore, you can select a location and enter any appropriate filename. Finally, click Save.
Once you get the basic idea, you can accelerate the process by pressing Cmd + S in the Preview window. Now choose the desired image file format for that screenshot and click Save.
Alternatively, you can click the Close button from the top-left corner of the You will automatically see the option to save the screenshot in the desired format in the preview window.

